

Table of Contents
- What You'll Need Before You Start
- Step 1: Read the Hallmarks and Maker's Marks
- Step 2: Identify the Cut and Era of the Stone
- Step 3: Examine Metal Alloys and Purity Stamps
- Step 4: Inspect Craftsmanship, Settings, and Findings
- Step 5: Test the Stone with Tools for Testing Gemstone Authenticity
- Step 6: Tell Natural, Lab-Grown, and Treated Stones Apart
- Step 7: Understand Gemstone Appraisal Cost and Certification
- Frequently Asked Questions
Last Updated: September 20, 2026
What You'll Need Before You Start
Knowing how to authenticate vintage gemstones starts with a simple truth: the paperwork is often worth more than the loupe. Knowing how to authenticate vintage gemstones starts with a simple truth: the paperwork is often worth more than the loupe. The fastest way to separate a genuine heirloom from a clever reproduction is to gather the right tools and documents before you touch the stone.
A jeweler's loupe is a small magnifying lens, usually 10x power, used to inspect gemstone surfaces, settings, and hallmarks.
Gather these before you begin:
- 10x jeweler's loupe or a macro lens attachment
- Bright, diffused light source (a desk lamp works)
- Original receipts, certificates, or appraisal documents
- Soft lint-free cloth and a small tray
- Magnifying app or a phone camera for close-up photos
Step 1: Read the Hallmarks and Maker's Marks
Hallmarks and maker's marks are your first written evidence. A hallmark is an official stamp indicating metal purity and, often, the assay office that tested it. A maker's mark identifies the jeweler or manufacturer.
Common red flags in this step:
- Stamps that look freshly cut into old metal
- Maker's marks that do not match the claimed vintage era
- Mixed purity stamps on a single piece
Step 2: Identify the Cut and Era of the Stone
The cut of a stone often dates it more reliably than any stamp. An old mine cut features a small table, high crown, and a large open culet at the bottom. The old european cut refined this with a more circular girdle and better symmetry. Both predate modern brilliant cuts and appear frequently in antique jewelry.
| Cut Style | Typical Era | Key Visual Trait |
|---|---|---|
| Old mine cut | Georgian to early Victorian | Cushion shape, large culet |
| Old european cut | Victorian to Edwardian | Rounder girdle, higher crown |
| Transitional cut | Early 20th century | Hybrid of old and modern |
| Modern brilliant | Mid-20th century onward | Precise symmetry, small culet |
Step 3: Examine Metal Alloys and Purity Stamps
If the metal tests inconsistent with its stamp, treat the whole piece as suspect until proven otherwise.
Step 4: Inspect Craftsmanship, Settings, and Findings
Craftsmanship reveals what stamps can hide. Look at how the stone sits in its setting technique. A bezel setting wraps metal around the stone's edge; a prong setting holds it with raised claws. Vintage jewelers cut prongs by hand, so slight asymmetry is normal. Perfectly uniform, machine-made prongs on a supposedly antique piece are a red flag.
Ask yourself:
- Do the solder joints match the age of the metal?
- Are the prongs worn evenly, as they would be after decades of wear?
- Does the craftsmanship feel consistent across the whole piece?
Step 5: Test the Stone with Tools for Testing Gemstone Authenticity
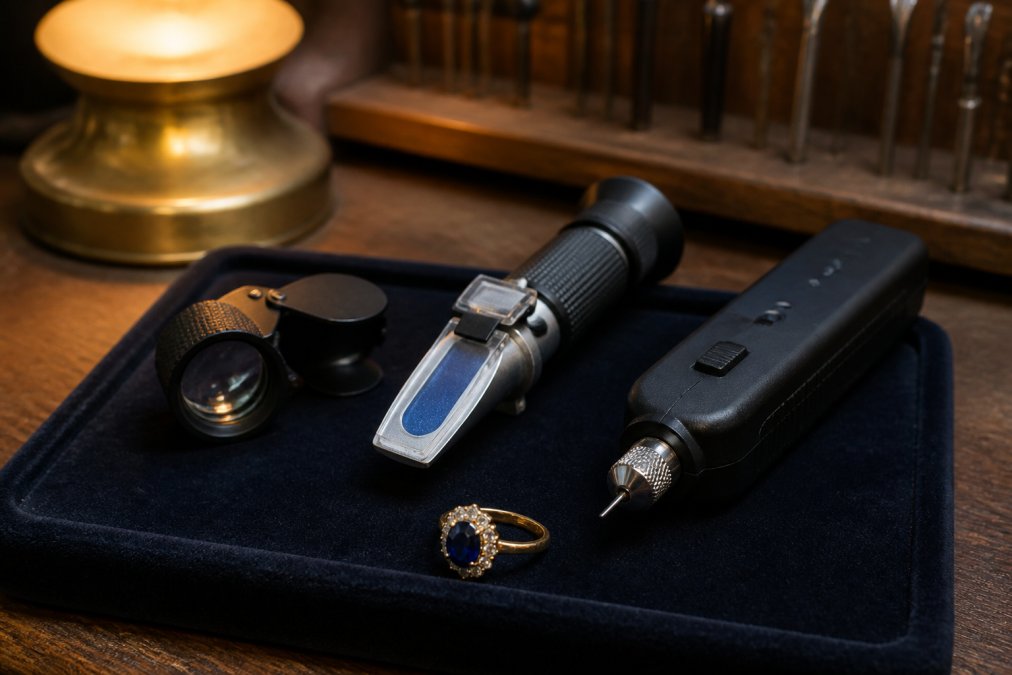
Tools for testing gemstone authenticity give you objective data that the eye cannot. A refractive index (RI) reading measures how light bends through a stone and helps identify its species. Specific gravity (SG) compares the stone's density to water. Thermal conductivity testers separate diamond from most simulants in seconds. Most ranking guides stop at naming these tools. Here is how to actually run each one without damaging a vintage stone.
Refractive index with a refractometer
A refractometer works by placing the stone's table facet flat against a glass hemisphere coated with a drop of RI liquid, then reading the shadow line against a scale. Every gem species has a known RI range, corundum (ruby and sapphire) sits around 1.76-1.77, quartz around 1.54-1.55, and diamond at 2.42, which is above the range of a standard refractometer and requires a dedicated diamond tester instead.
Specific gravity with a scale and water
SG is the stone's weight divided by the weight of an equal volume of water. The home method is a hydrostatic weighing: weigh the unmounted stone dry, then weigh it suspended in water by a thin wire or thread, and divide the dry weight by the difference between the two. A 2.65 result points toward quartz; 3.52 toward diamond; 4.00 toward corundum.
Thermal and electrical testers
A thermal conductivity tester (often called a diamond tester) measures how quickly heat moves through the stone. Diamond conducts heat far faster than glass, cubic zirconia, or most simulants, so the tester beeps or lights up on diamond and stays quiet on imitations. Moissanite is the notable exception, early thermal testers passed it as diamond, which is why multi-testers now add an electrical conductivity check, since moissanite conducts electricity and diamond does not.
What a basic home kit costs
A 10x loupe runs roughly $10-$30. A diamond/moissanite multi-tester runs about $30-$150. A student refractometer with RI liquid typically runs $150-$400. A precision scale accurate to 0.01 g for SG work runs $30-$100. You do not need all of them, a loupe plus a multi-tester covers most vintage buying decisions.
Step 6: Tell Natural, Lab-Grown, and Treated Stones Apart
A natural gemstone formed underground over millions of years. Lab-grown stones have the same chemical composition but are created in a controlled environment. Synthetic stones are manufactured imitations, and treated stones are natural gems whose color or clarity has been enhanced. Most guides stop at those definitions. The useful question for a vintage buyer is narrower: is this stone natural, lab-grown, or natural-but-treated, and can I tell from the bench?
Natural versus lab-grown
Under magnification, natural stones usually contain inclusions that formed during growth, mineral crystals, feathers, or "fingerprint" patterns that no factory reproduces. Lab-grown stones may show curved growth lines (visible under a loupe in some CVD and HPHT diamonds), metallic flux residue (common in flux-grown rubies and emeralds), or pinpoint inclusions arranged in unnatural patterns.
The treatment problem, the gap most guides skip
Treatment is where vintage buyers actually get burned, because a treated stone is still a real stone and will pass every test above. Four treatments dominate the vintage market:
- Heat treatment, routine and stable for sapphire and ruby. It is nearly undetectable without a lab, and it is widely accepted in the trade. Assume most blue sapphires over 50 years old have been heated unless a lab report says otherwise.
- Fracture filling, lead glass or resin pumped into surface-reaching cracks in ruby and diamond to hide them. Under a loupe, filled cracks show a flash effect (a blue or orange sheen that shifts as you tilt the stone) and sometimes trapped gas bubbles. Filler can be damaged by heat and by ultrasonic cleaners, so a filled stone is a real liability in a vintage piece.
- Dyeing, common in jade, turquoise, and lower-grade emerald. Dye concentrates in cracks and looks darker there; a cotton swab with acetone on an inconspicuous spot will lift color from a dyed stone but not from a natural one.
- Oiling and resin, standard for emerald, since emerald is almost always included. Cedar oil and modern resins fill surface cracks to improve clarity. Under a loupe, oiled emeralds show a slight iridescent sheen along fractures.
What you can and cannot do at home
FTC guidance on jewelry advertising and disclosure requires sellers to disclose treatments that affect value, and Jewelers Vigilance Committee resources on gemstone disclosure explains what those disclosures should look like in practice.
Step 7: Understand Gemstone Appraisal Cost and Certification
Gemstone appraisal cost varies with the item and the depth of testing requested. A full laboratory report is the only document that carries real weight for insurance, resale, or estate purposes.
Red flags in online listings:
- No certificate photo, only a text claim
- Refusal to provide a loupe-level close-up
- Prices far below market for the stated carat weight and clarity
- Vague descriptions that avoid the words natural, treated, or lab-grown
Frequently Asked Questions
How can I test gemstones for authenticity at home?
Start with a 10x jeweler's loupe to inspect inclusions, facet edges, and the culet. Check hallmarks and purity stamps on the metal. Use a gem tester for thermal conductivity on diamonds, and weigh the stone to estimate specific gravity. These non-destructive tests narrow the field, but only a gemological lab can confirm a natural vintage gemstone with certainty.
What tools do professional gemologists use to verify stones?
Gemologists rely on a refractometer for refractive index, a polariscope for optic character, a spectroscope for absorption lines, and a microscope for inclusions. Thermal conductivity testers separate diamond from moissanite. Many of these tools are available to home users, though a jeweler's loupe and a good scale cover most of what you need for basic authentication.
How much does professional gemstone appraisal cost?
At ABC Rugs, Kilims & Jewelry, GIA certification and verification for vintage jewelry, diamonds, and gemstones ranges from $350 to $1,500 depending on the item and services requested. All GIA fees are paid directly to GIA. Independent appraisals for insurance or resale typically fall in a similar range, and the cost scales with the number of stones and the depth of testing.
What are the signs of a synthetic versus natural vintage gemstone?
Natural stones usually show irregular inclusions, slight color zoning, and hand-cut facet edges under a loupe. Lab-grown and synthetic stones often have perfectly uniform color, curved growth lines, or gas bubbles. Treated stones may show dye concentrated in fractures or surface-reaching cracks. A microscopic laser inscription on the girdle also points to a lab-grown origin.
Authenticating vintage gemstones takes patience, but the process rewards careful buyers. If you would rather start with pieces that already carry verified certification, ABC Rugs Kilims & Jewelry curates antique and vintage jewelry with documented provenance and offers GIA verification on request. Browse our certified gemstones and estate pieces, and let our team help you source exactly what you are looking for.


