

Table of Contents
- Before You Clean: Identify Your Jewelry Type
- Tools and Materials You'll Need
- How to Remove Tarnish From Vintage Silver
- Cleaning Delicate Vintage Gemstones
- Step-by-Step Process for How to Clean Vintage Antique Jewelry Safely
- When to Take Antique Jewelry to a Professional
- Cleaning Solutions to Avoid
- Repair vs. Clean: Knowing the Difference
Last Updated: August 30, 2026
Before You Clean: Identify Your Jewelry Type
The biggest mistake when cleaning vintage antique jewelry is treating all pieces the same way. A method safe for sterling silver could destroy an opal. Before applying any cleaning solution, identify exactly what you're working with.

Costume jewelry uses base metals like brass or copper with glass or synthetic stones. Fine jewelry uses precious metals (gold, silver, platinum) and genuine gemstones. This distinction matters enormously: costume jewelry often has glued settings that dissolve in water, while fine jewelry can typically handle more aggressive cleaning.
Look for hallmarks inside the piece: "925" or "sterling" indicates silver; "14K" or "18K" means gold; "Plat" means platinum. Marks like "GP" (gold plated) or "EPNS" (electroplated nickel silver) indicate costume jewelry. Weight is another clue, fine jewelry feels substantially heavier than costume pieces of similar size.
Chemical Reaction Testing
Before submerging any piece, perform a simple test. Dampen a Q-tip with distilled water and touch it to an inconspicuous area. Watch for color bleeding, surface dulling, or setting movement. If nothing happens after 30 seconds, the piece is likely safe for gentle water-based cleaning.
For gemstones, test with a single drop of distilled water on the back of the stone. Porous gemstones like opals, turquoise, and pearls will absorb water and darken slightly. If this happens, skip water-based cleaning and use dry methods only.
Tools and Materials You'll Need
You don't need expensive specialty equipment. Most supplies cost just a few dollars.
Essential supplies:
- Soft-bristled brush (old toothbrush works, but a dedicated jewelry brush is better)
- Microfiber cloth (the most important tool, cleans without scratching)
- Distilled water (tap water leaves mineral residue)
- Mild dish soap (unscented, without additives)
- Q-tips (for spot cleaning tight spaces)
- Small shallow dish (ceramic or glass)
- Paper towels or lint-free cloth for drying
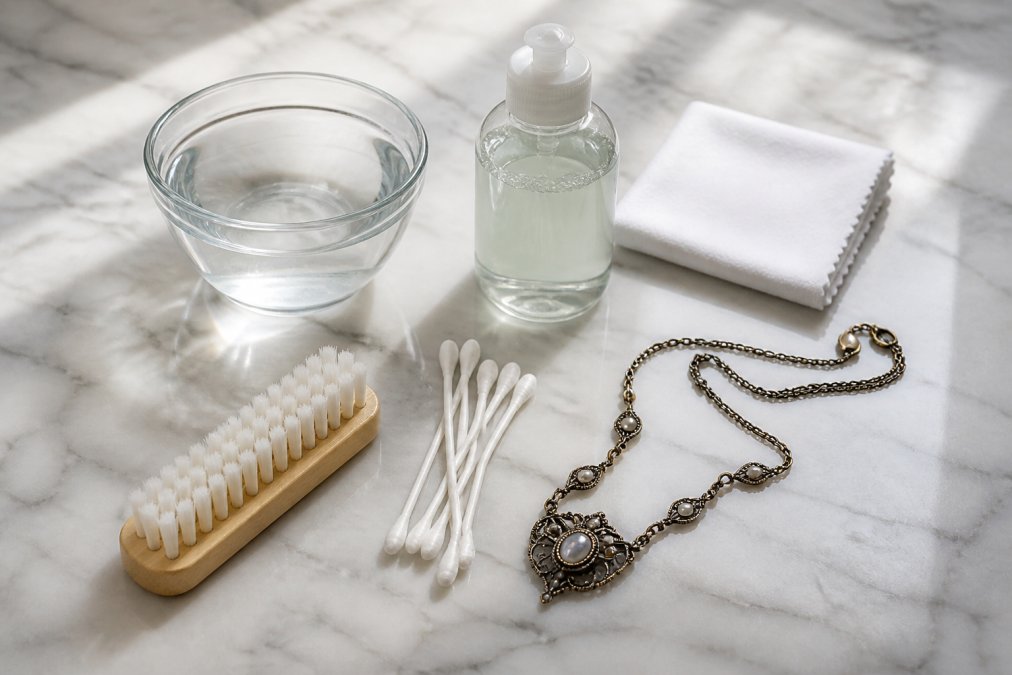
Optional but helpful: soft cotton gloves, small magnifying glass, ultrasonic cleaner (for strong fine jewelry only), or steam cleaner.
The microfiber cloth is transformative, it won't scratch metal or gemstones. Many vintage pieces restore to shine with nothing but a microfiber cloth and patience. ABC Rugs Kilims & Jewelry includes a jewelry cleaning polishing cloth with fine gemstone purchases for exactly this reason.
How to Remove Tarnish From Vintage Silver
Silver tarnish is oxidation where silver bonds with sulfur compounds in air. It appears as dark gray or black discoloration, usually at edges and crevices. Tarnish is purely cosmetic and completely reversible.
The Gentle Soak Method
Fill a shallow dish with lukewarm distilled water and add a few drops of mild dish soap. Water should be cool enough to hold your hand in comfortably, hot water weakens old solder joints.
Submerge the silver piece for 5-10 minutes. The soap lifts tarnish and residue. Don't rush; tarnish that took years to develop won't vanish in seconds.
Use a soft-bristled brush to gently scrub, paying attention to crevices. Use light pressure, the goal is dislodging tarnish, not abrading metal. Rinse thoroughly under running distilled water until all soap residue is gone.
Pat dry immediately with a soft cloth. Water left on the surface will reoxidize and create new tarnish.
Spot Cleaning Tarnish
For lightly tarnished pieces or delicate jewelry, spot cleaning with a microfiber cloth often suffices. Dampen the cloth with distilled water, add a tiny amount of mild dish soap, and gently rub the tarnished area in circular motions.
Q-tips dipped in the same soapy solution work perfectly for cleaning inside rings, around stone settings, or in narrow crevices. The small tip reaches places a brush can't, and you control pressure easily.
Cleaning Delicate Vintage Gemstones
Gemstones require different care than metal. The general rule: if unsure, use only distilled water and a microfiber cloth.
Most gemstones tolerate gentle water-based cleaning. Diamonds, sapphires, rubies, and emeralds are hard and stable. However, even these can be damaged if the setting is weak or the stone has internal fractures.
The real danger comes from porous gemstones, stones with tiny spaces that absorb liquids and crack when they dry.
Porous Gemstones and Special Care
Opals, turquoise, pearls, and emeralds are porous and should never be soaked. These stones absorb water like a sponge, causing internal stress as they dry. Damage often appears weeks after cleaning, making the connection impossible.
For porous gemstones, use only a barely damp microfiber cloth. Wipe gently, then immediately dry completely. Never let water sit on the surface.
Pearls are particularly fragile, they're organic material, essentially layers of nacre around an irritant. Water and soap weaken the nacre and cause layers to separate. Use only a dry microfiber cloth or have the piece professionally cleaned.
Most vintage emeralds are treated with oils or resins to fill fractures and improve appearance (gia.edu). Water leaches out these treatments, making the stone look dull. If your vintage emerald looks especially vibrant, it's almost certainly treated. Treat it like an opal: dry cloth only.
Step-by-Step Process for How to Clean Vintage Antique Jewelry Safely
Step 1: Prepare your workspace. Lay out a soft cloth where you'll work. This prevents rolling and protects against drops. Gather all tools within arm's reach.
Step 2: Perform your chemical reaction test. Test the gemstone and setting with a damp Q-tip. Wait 30 seconds and observe. If anything changes, use dry-cleaning methods only.
Step 3: Prepare your cleaning solution. Fill a small dish with lukewarm distilled water. Add 2-3 drops of mild dish soap, barely soapy.
Step 4: Soak the piece. Submerge for 5-10 minutes (3-5 for delicate gemstones). This softens tarnish and allows soap to penetrate crevices.
Step 5: Brush gently. Using a soft-bristled brush, gently scrub all surfaces, especially backs of stones and inside settings. Use light, circular motions. Never scrub hard.
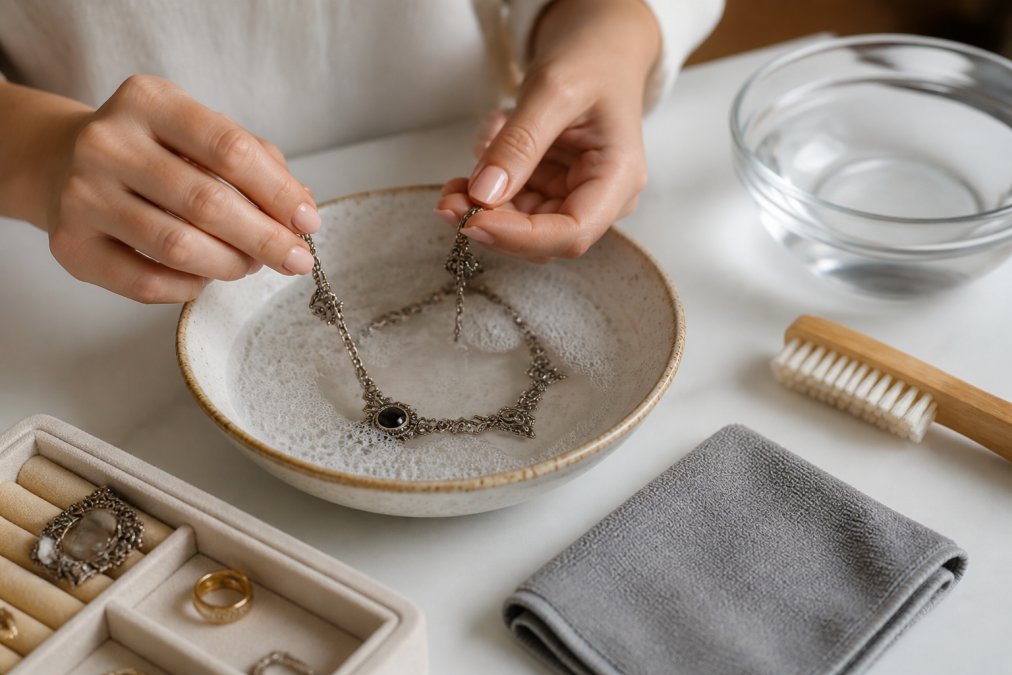
Step 6: Rinse thoroughly. Hold the piece under running distilled water and rinse until all soap residue is gone. Soap left on the surface creates a dull film.
Step 7: Pat dry immediately. Use a soft, lint-free cloth and pat the piece dry. Don't wipe or rub. Make sure every surface is completely dry, including inside settings and crevices.
Step 8: Final polish. Once completely dry, use a microfiber cloth to gently polish the piece. This removes water spots and brings out shine.
Cleaning Metal Settings
Metal settings require the same gentle approach as stones. Prongs, bezels, and gallery work are often delicate and can bend or break with rough handling.
When brushing around a setting, direct strokes away from the stone, not toward it. For ornate settings, use a Q-tip instead of a brush for better control.
Pay attention to solder joints, where different metal pieces fuse together. Old solder weakens over time, especially on pieces over 50 years old (peer-reviewed research). Avoid direct pressure on solder joints. If you notice gaps or movement, stop and take the piece to a professional.
Drying and Storage Best Practices
Pat dry immediately after rinsing. If cleaning multiple pieces, dry each before moving to the next. Don't let cleaned pieces sit waiting to be dried.
Keep vintage jewelry in a cool, dry place away from humidity. Humidity accelerates oxidation and corrosion. Avoid bathrooms or basements where moisture fluctuates.
Store pieces individually to prevent scratching. Soft cloth pouches work well. If you don't have pouches, wrap each piece in acid-free tissue paper. Never use regular plastic bags, they trap moisture.
For silver, consider anti-tarnish strips or bags. These absorb sulfur compounds before they oxidize the silver and are inexpensive and effective, especially for pieces you don't wear frequently.
When to Take Antique Jewelry to a Professional
Some situations demand professional help.
Take your piece to a professional if:
- The setting shows visible damage, loose stones, or bent prongs
- The piece is extremely old (pre-1900) or made with unfamiliar materials
- Gemstones are porous and need deep cleaning
- The piece has sentimental or significant monetary value and you're unsure
- You've already attempted cleaning and the piece looks worse
- The piece has intricate enamel work, mother-of-pearl inlay, or other fragile elements
- Professional restoration or repair is needed alongside cleaning
Professional jewelers have tools and expertise home cleaning can't match. An ultrasonic cleaner in professional hands can safely clean pieces that would be damaged by amateur use. Professionals can disassemble pieces, clean internal components, and reassemble without damaging settings.
Professional cleaning typically costs $25 to $100 depending on complexity. For heirloom pieces or valuable vintage jewelry, this investment protects far greater value. A piece worth $1,000 or more deserves professional care.
ABC Rugs Kilims & Jewelry works with collectors who inherit or acquire valuable vintage pieces. We recommend professional appraisal and cleaning for any piece with significant monetary or sentimental value.
Cleaning Solutions to Avoid
Certain cleaning methods will damage vintage jewelry.
Never use:
- Bleach or ammonia-based cleaners (corrode metal and damage gemstones)
- Vinegar (acidic and etches metal surfaces)
- Baking soda paste (abrasive and scratches metal)
- Harsh commercial jewelry cleaners (too strong for vintage pieces)
- Toothpaste (abrasive particles scratch metal and gemstones)
- Chlorine or saltwater (corrodes metal and damages gemstones)
- Boiling water (cracks gemstones and weakens solder joints)
- Alcohol or acetone (dissolves gemstone treatments and damages delicate materials)
Baking soda is widely recommended online but is too abrasive for vintage pieces. It scratches soft metals like gold and silver and damages delicate gemstone surfaces.
Vinegar is similarly problematic. The acidity etches metal, creating a dull, pitted surface difficult or impossible to restore.
Commercial cleaners marketed as "safe for all jewelry" often aren't. Many contain ammonia or harsh chemicals. Always read the label.
Ultrasonic and steam cleaners are effective for strong modern jewelry but risky for vintage pieces. Vibrations can loosen stones in weakened settings. Steam damages porous gemstones and weakens old solder joints.
Repair vs. Clean: Knowing the Difference
Sometimes what looks like dirt or tarnish is actually damage that cleaning won't fix.
Cleaning fixes:
- Tarnish (dark oxidation on silver)
- Surface dirt and residue
- Water spots and mineral deposits
- Dull appearance from buildup
- Discoloration from age
Repair fixes:
- Bent or damaged prongs
- Loose or missing stones
- Broken chains or clasps
- Cracked or chipped gemstones
- Worn or damaged settings
- Solder joints needing re-soldering
If you clean a piece and it still looks dull or discolored, the issue might be damage, not dirt. A deeply scratched gemstone won't shine no matter how thoroughly you clean it.
A professional jeweler can assess whether cleaning will restore your piece or whether repair is needed. Sometimes both are necessary.
| Issue | What It Looks Like | Fix Type | When to DIY | When to Get Professional Help |
|---|---|---|---|---|
| Tarnish | Dark gray/black coating on silver | Cleaning | Safe for most pieces | Delicate or extremely old pieces |
| Water spots | White or cloudy residue | Cleaning | Always safe | N/A |
| Loose stone | Stone moves when touched | Repair | Never DIY | Always professional |
| Bent prong | Prong visibly bent or twisted | Repair | Never DIY | Always professional |
| Dull gemstone | Stone looks cloudy or scratched | Cleaning or repair | Try cleaning first | If cleaning doesn't help |
| Broken chain | Chain visibly broken | Repair | Never DIY | Always professional |
Vintage antique jewelry carries history and craftsmanship that modern pieces rarely match. Cleaning it properly preserves that value and ensures these pieces remain beautiful for generations.
If you're building a collection of vintage jewelry or have inherited pieces you want to preserve, ABC Rugs Kilims & Jewelry offers curated fine jewelry with authentic certification and detailed care guidance. Our gemstone collection includes investment-grade pieces like the 925 Sterling Silver Pendant with Antique Peridot and the 925 Sterling Silver Pendant with Antique Mozambique Garnet, each accompanied by authentic certification. Start with proper cleaning techniques today, and your vintage pieces will reward you with lasting beauty.

Frequently Asked Questions
Should you clean antique jewelry or will it ruin the value?
Gentle cleaning typically preserves value by removing dirt and grime that obscure the piece's true condition. However, aggressive cleaning or removing original patina can diminish value. The key is using mild methods: distilled water, soft-bristled brushes, and ammonia-free solutions. Vintage patina on silver, for example, can be part of the piece's character and authenticity. When in doubt about a valuable heirloom, consult a professional appraiser before cleaning.
What is the safest way to clean delicate vintage gemstones?
Porous gemstones like opals, pearls, and turquoise require extra care and should be spot-cleaned with a damp microfiber cloth rather than soaked. Harder stones like rubies and sapphires tolerate gentle soaking in distilled water with a drop of mild dish soap. Never use ultrasonic cleaners or steam cleaners on delicate vintage gemstones, as vibrations and heat can crack or damage them. Pat dry immediately with a soft cloth to prevent water spots and residue buildup.
How do you remove tarnish from antique silver jewelry without damage?
The safest method is a gentle soak: mix warm distilled water with a small amount of mild dish soap, soak the silver piece for 5-10 minutes, then use a soft-bristled brush to gently work away tarnish. Rinse thoroughly with distilled water and pat dry with a microfiber cloth. For light tarnish, spot cleaning with a damp Q-tip works well. Avoid abrasive polishes and harsh chemicals like ammonia, which can strip protective oxidation and damage delicate settings or gemstones.
Can I use ultrasonic cleaners on vintage or antique jewelry?
Ultrasonic cleaners are generally not recommended for vintage antique jewelry. The vibrations can loosen prongs, crack delicate gemstones, and damage intricate metalwork common in older pieces. Vintage jewelry with porous stones, loose settings, or fragile construction is especially at risk. Steam cleaners pose similar dangers. Stick to hand-cleaning methods with distilled water, mild soap, and soft brushes for safe, effective results that won't compromise the piece's integrity or value.
This article was written using GrandRanker


